The launch of DJI Modify marks a significant milestone in the world of drone technology and 3D modelling. This highly anticipated release, especially with its offer of a free 6-month public beta license, has created a buzz among enthusiasts and professionals alike who are eager to explore the capabilities of this new software.
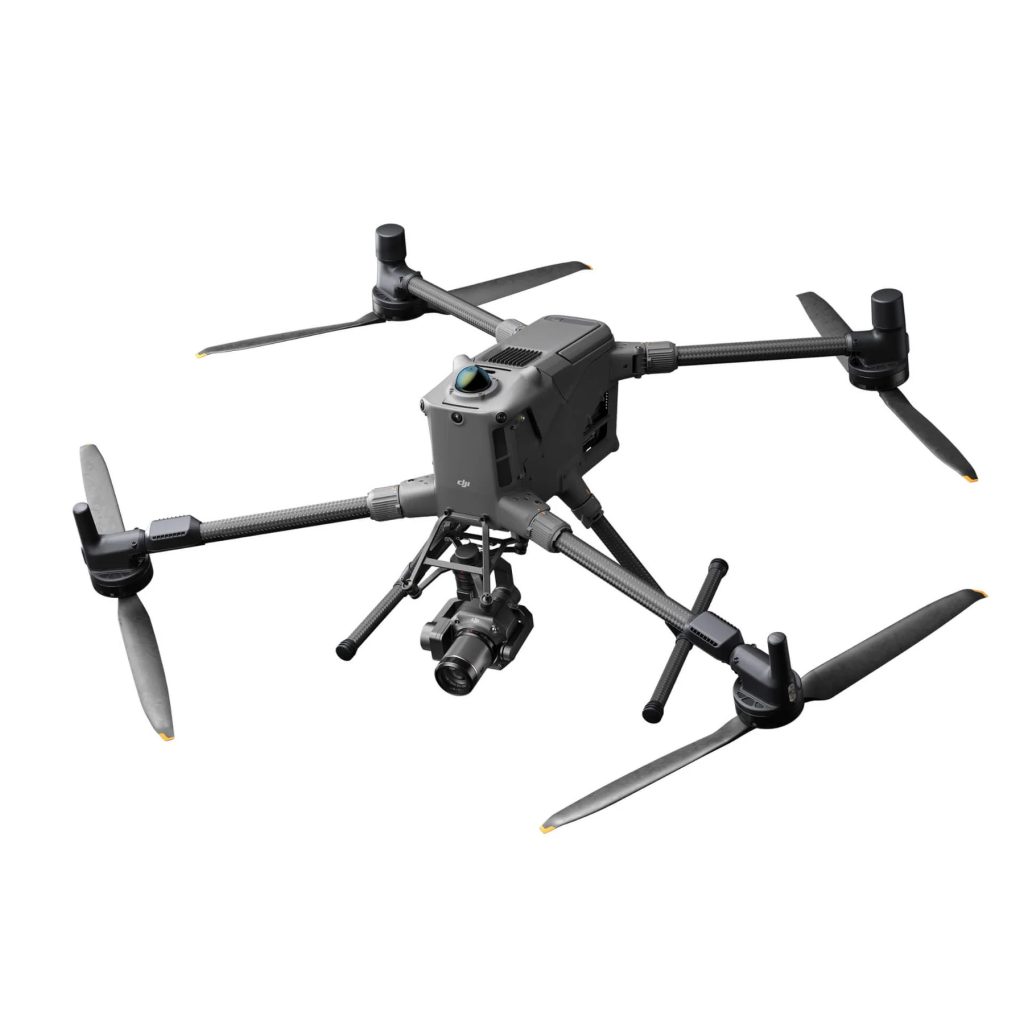
DJI Modify represents DJI’s latest innovation, a sophisticated 3D model editing tool designed to complement their existing suite of products. It works harmoniously with DJI’s enterprise drones and their 3D modelling and mapping software, DJI Terra. This integration offers a robust solution for various applications, including aerial surveying, transportation planning, and emergency response scenarios like firefighting.
Let’s dive into how to use the main features.
Remove Floating Parts
This tool helps clean up and refine the model by removing fragments or objects that are not connected or attached to the main body of the model.
1) Start Editing
- Open your project.
- Enter the model editing screen.
2) Activate Tool
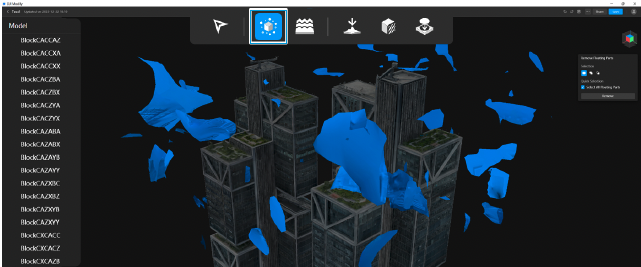
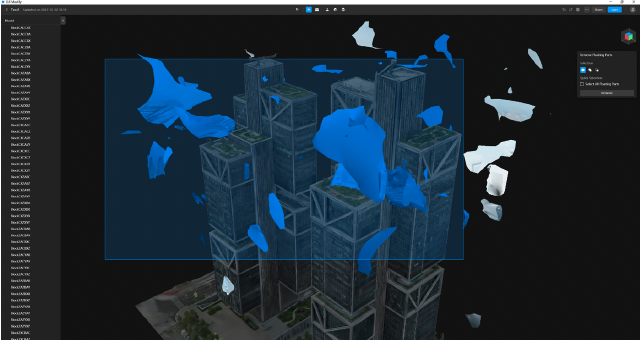
- Click the floating parts icon (see the image below) to turn on the tool.
- The tool will highlight floating parts in blue and the main model in grey.
3) Select Parts
Click on a floating part to select it, or click and drag to select multiple parts.
4) Modify Selection
- To add more parts to the selection, hold the Shift key and drag to select.
- To remove parts from the selection, hold the Alt key and drag to select.
5) Remove Selected Parts
Hit the ‘Remove’ button or press the Delete or Backspace buttons to remove selected parts.
6) Save Changes
- Click ‘Save’ or press Ctrl + S to save your edits.
- To undo changes, use the undo button or press Ctrl + Z. Redo with Ctrl + Shift + Z.
7) Finalise Model
- Click ‘Render’ to synchronise the modifications to the high-quality model.
- Once rendered, changes cannot be undone. You can restore a previous version if needed before rendering.
Repairing Water Surfaces
This tool can address water-related issues during the modelling process, such as missing water surfaces, bulges, and texture distortions.
1) Activate the water surface repair tool (as seen in the image below) by clicking the software toolbar’s corresponding icon.
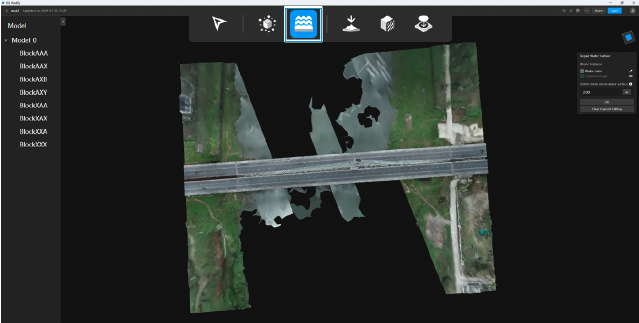
2) Open the colour extraction tool from the right panel to select the desired water surface colour from the model.
3) After selecting the colour, draw the water surface by left-clicking and following the model’s water contours. You can edit the shape by dragging the vertices to a new position when editing the water surface. You can also press Backspace or Delete to remove a vertex, and click Clear Current Editing to clear the drawing and start over again quickly. Once complete, Modify will automatically generate a flat water surface.
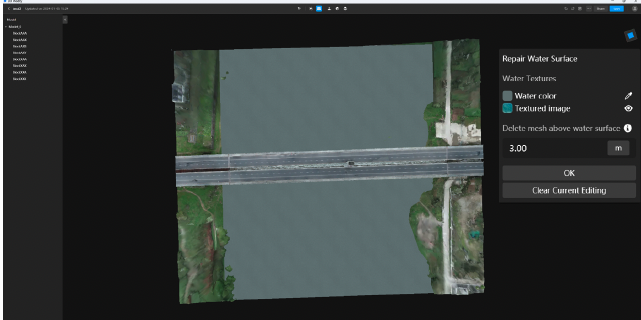
4) Once completed, left-click and drag the generated water surface to adjust its position and height.
5) Toggle the eye button (as seen in the image below) to display a simulated natural water texture from the right panel.
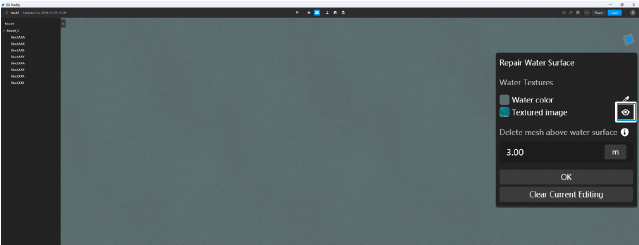
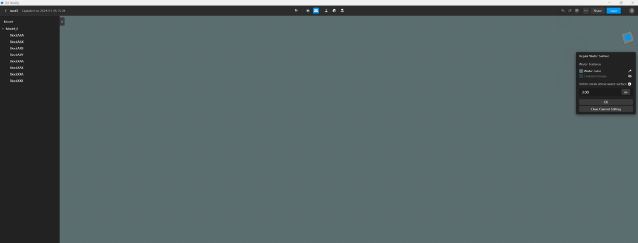
6) The software will automatically remove any model mesh below the water surface, with options to adjust the height of mesh removal above the water to 300 meters maximum. The height is set to 3 meters by default, meaning it will automatically remove the mesh within 3 meters above the surface unless set to 0. The effects of removing the mesh above the water surface cannot be previewed in real-time. Users need to render the model to view the effects.
7) Save your water surface adjustments by clicking ‘OK’.
8) Finalise and apply all changes by selecting ‘Render’ from the options menu to synchronise with the high-quality model.
Surface Flattening
This tool can transform curved or irregular surfaces into flat surfaces, which is great for models with uneven or distorted surfaces. It also supports automatic vehicle selection for quick flattening and texture repair of vehicles in the model.
1) Activate Flattening Tool
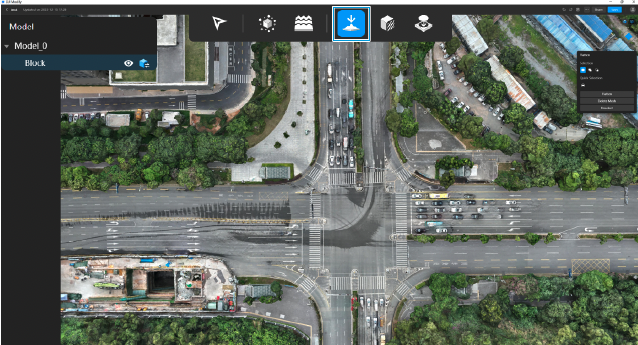
Click the flattening icon (in the image below) to turn on the tool. Enable high-quality mode for better model editing, this can be toggled by clicking on the blue cube next to the eye icon in the picture below.
2) Select Area
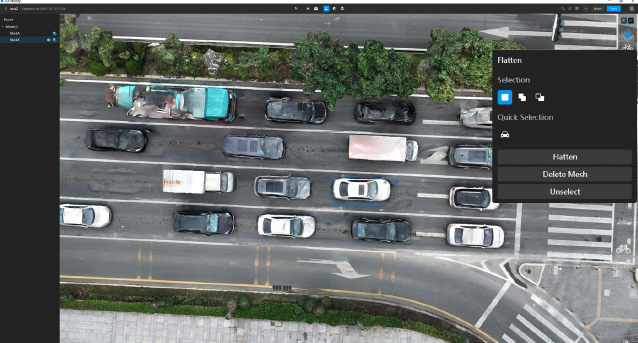
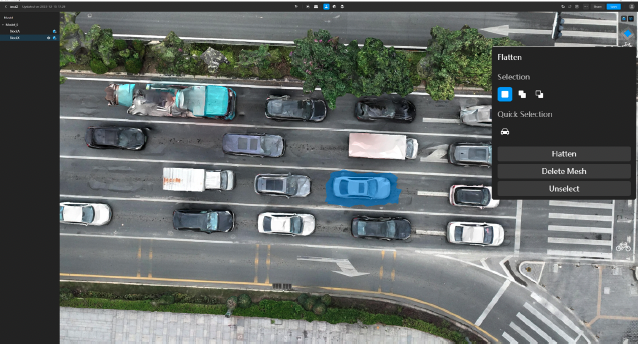
Draw a selection polygon with a left click and drag. When you’re done, click again on the starting point of the polygon or double-click anywhere to finish the selection, highlighting the area.
3) Modify Selection:
- Add: Hold Shift and draw to include more areas.
- Subtract: Hold Alt and draw to remove areas.
- Clear Selection: Click ‘Unselect’ to start over.
FYI: Mesh selection only takes effect when the high-quality model is enabled. The drawing tool is used to select areas on a 2D plane. Once the drawing is complete, the selection will become 3D and the selected polygonal area will be projected on the 3D model.
4) Undo/Redo Actions:
- Undo: Ctrl + Z
- Redo: Ctrl + Shift + Z
5) Vehicle Recognition (if needed):
- Click the vehicle icon to identify vehicles within the model quickly.
- Adjust the view to a top-down angle for clearer visibility and better recognition accuracy.
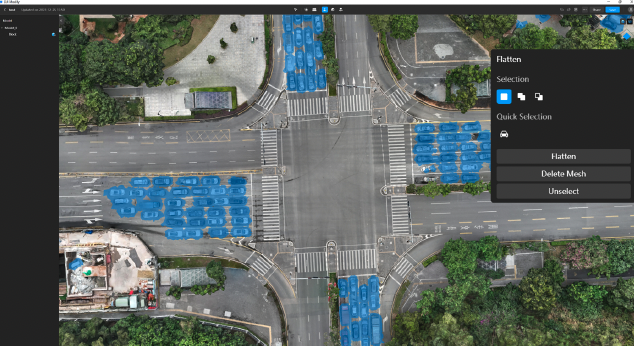
6) Flatten Surface
Once you’re done with selection and recognition, click ‘Flatten’ to flatten the surface of the model mesh automatically.
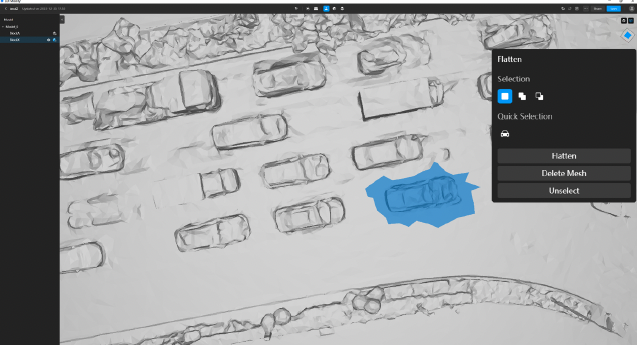
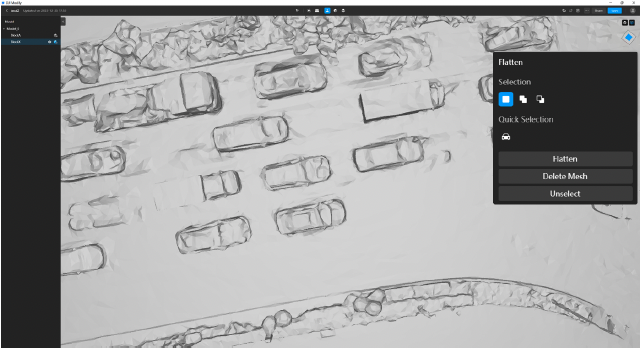
7) Delete Mesh (if needed)
Select the mesh area to be deleted and click ‘Delete Mesh’ or use the Delete key. You can undo/redo deletions if necessary.
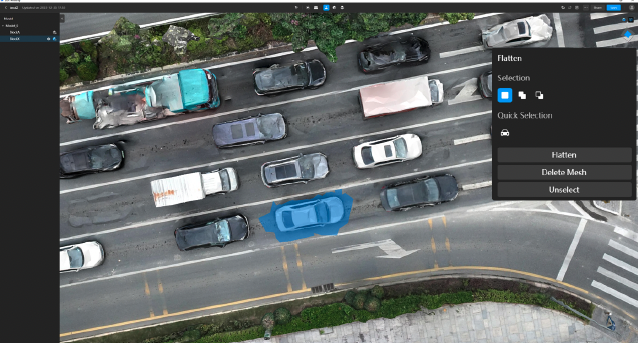
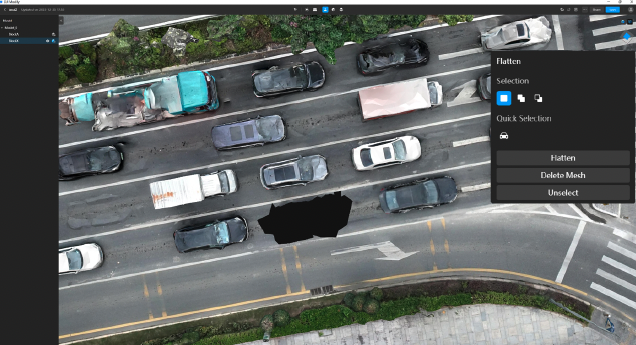
8) Review Modifications
After making changes, exiting, re-entering the project, or toggling the high-quality model, the modified areas will be highlighted with a blue box.

FYI: When users finish the modifications and successfully render the model, the high-quality model will be automatically disabled, and the modifications will be applied to the model.
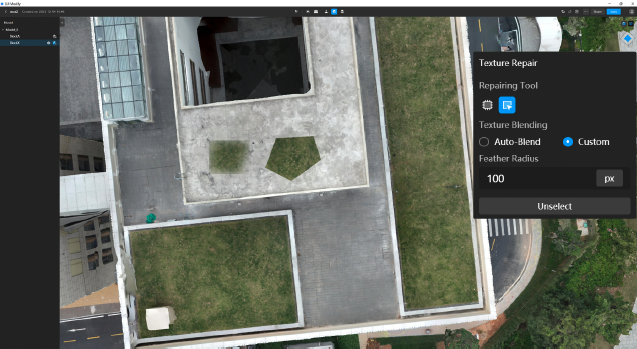
Texture Repair
This tool can be used to fix or correct issues or imperfections in the texture of a model. The texture tool supports two types of repairs, including erasing and cloning.
1) Activate Texture Repair Tool
- Click the texture repair icon (as seen in the image below) to activate the tool.
- Select high-quality mode if needed by clicking the corresponding icon (as seen in the image below).
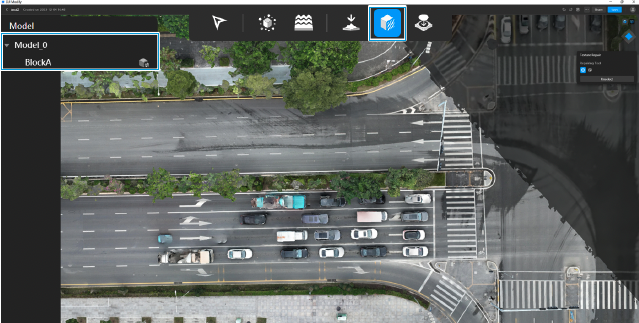
2) Choose Repair Type
- The Erase tool is the default selection for removing unwanted elements.
- When using this tool for the first time, wait a few seconds for initialisation.
3) Select Area for Repair
- Left-click to draw a polygon around the area you want to fix.
- Click the starting point or double-click anywhere to close the polygon.
- After selection, release the mouse button and Modify will automatically repair the texture of the selected area.
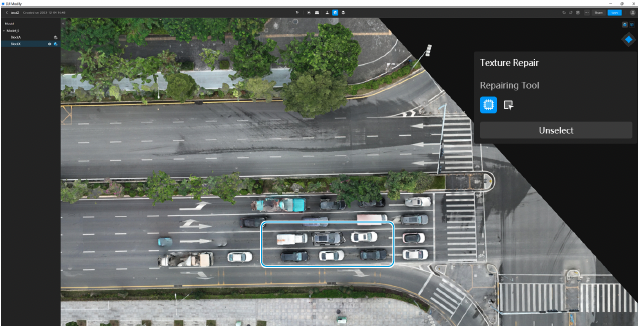
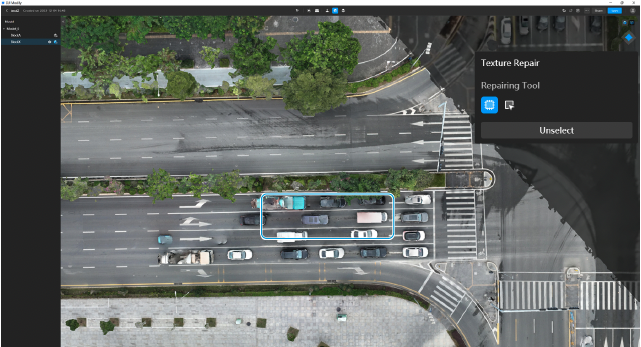
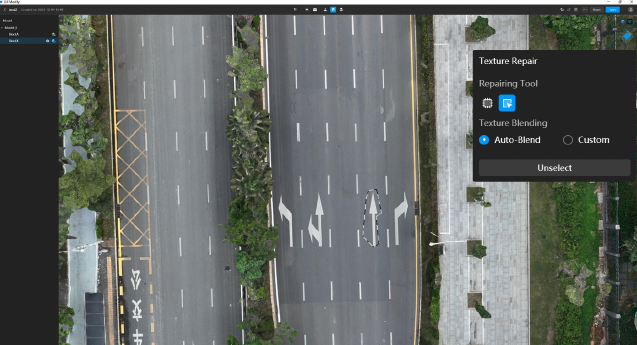
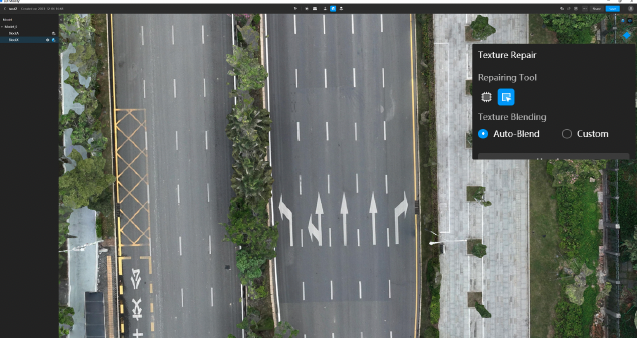
4) Clone Textures
- If you want to clone a selected area, click the clone tool icon to copy textures from one area to another.
- To do this, click the corresponding button (as seen in the image below) to draw a selection polygon around the texture to be cloned.
- The edges of the selected area will be highlighted, then left-click and drag the selected texture to a new location.
- Release the mouse at the desired position and Modify will perform the patch.
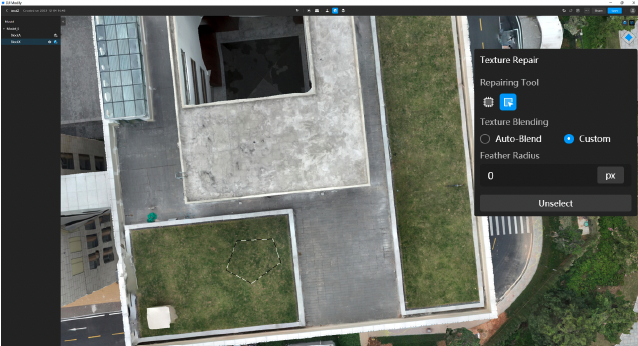
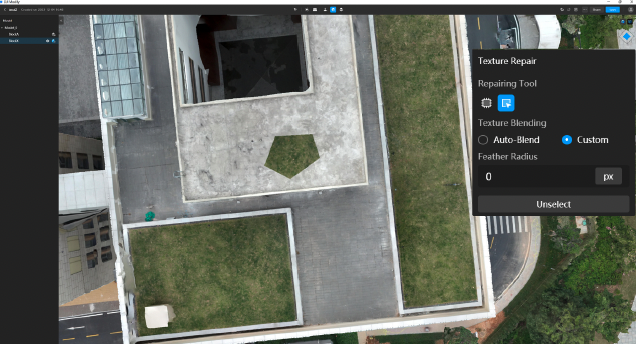
6) Blend Textures
- To blend the cloned area better, click ‘Custom’ to adjust the feather radius for a smooth transition.
- Increasing the feather radius blends the texture more seamlessly.
Hole Filling
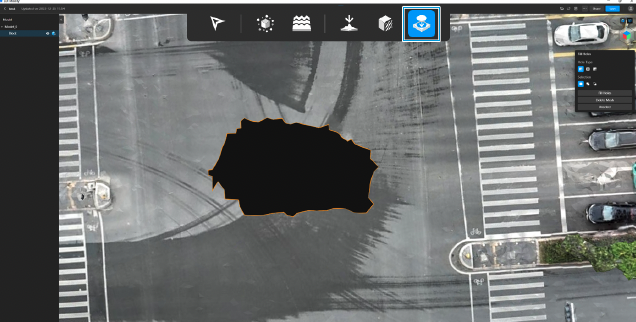
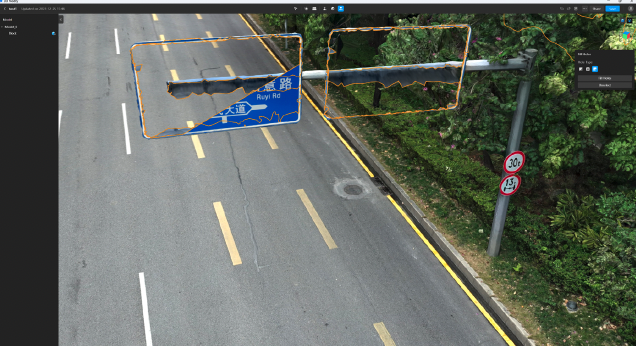
This tool can automatically fill in or repair holes or gaps in the model’s geometry, such as patching up the holes on a building or a guideboard, ensuring a visually smooth model. The hole-filling tool offers three types of patching, including custom, entire, and partial hole-filling.
1) Activate the Tool
Click the hole-filling icon (as seen in the image below) to start the tool.
2) Select Model Quality
Choose high-quality models for editing by clicking the corresponding icon on the sidebar.
3) Choose Hole Type
- Custom: Select for irregular shapes. Click the custom icon, then draw a polygon around the area by clicking to start, and double-clicking to end.
- Entire: For filling all recognised holes, click the entire fill icon, then select the area.
- Partial: For partially filling holes, click the partial fill icon and select the edges to define the filling boundaries.
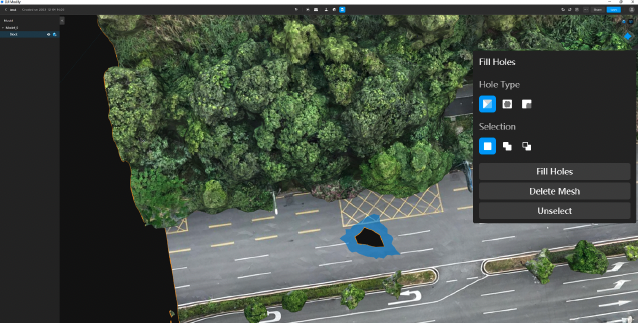
4) Modify Selection
- Add to Selection: Hold Shift and click or drag to include more areas.
- Subtract from Selection: Hold Alt and click or drag to remove areas.
- Clear Selection: Click ‘Unselect’ or press Ctrl + Shift + Z to redo an action.
5) Fill Holes
After making your selection, click ‘Fill Holes’ to patch them up.
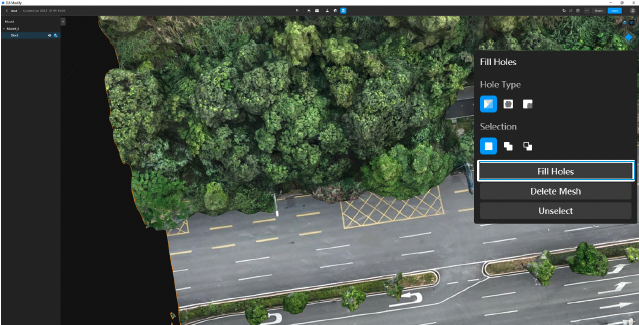
6) Hole Filling Irregular Shapes
For a custom approach to irregular shapes or multiple small holes:
- Use the custom hole-filling tool to outline and delete the unwanted mesh within the selected area.
- The system will recognise the space where the mesh was as a hole.
If you want to fill the entire hole:
- Click the icon for the entire hole-filling tool to activate it.
- Click or draw around the hole to select it entirely.
Once you’ve defined the area that needs repair, hit ‘Fill Holes’ and DJI Modify will process your input and automatically fill in the holes, repairing the model.
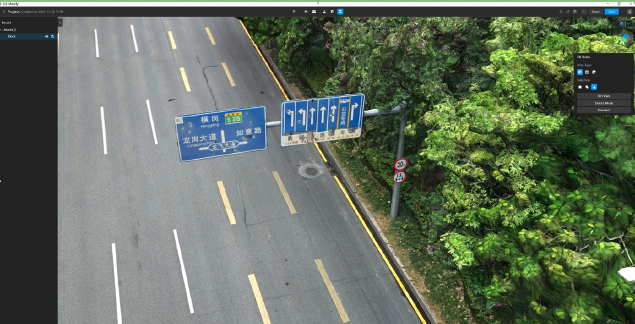
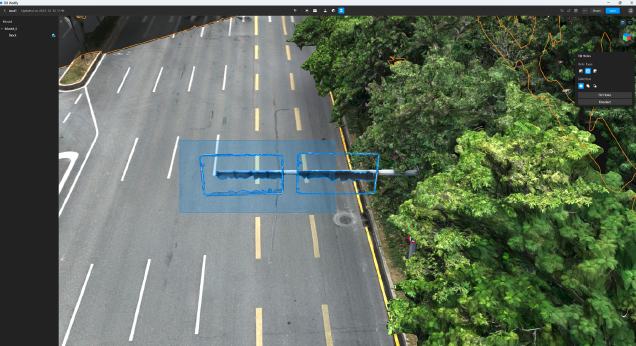
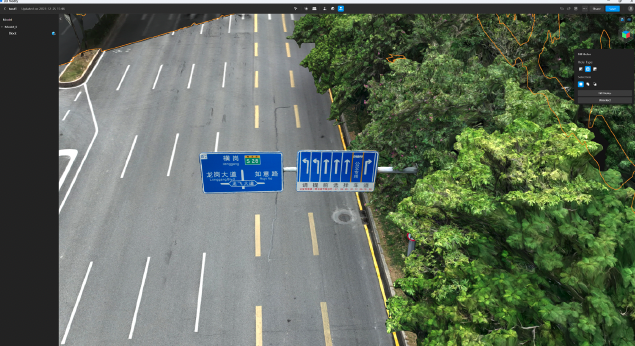
7) Partial Hole Refilling
If a hole only needs to be partially patched up, use the partial hole-filling tool to highlight the outline of the hole in the model that needs attention.
- Then click at two or more distinct points along the edges of the highlighted hole.
- These points act as markers that outline the section of the hole that you intend to patch.
- After setting the reference points, click ‘Fill Holes’.
- DJI Modify will use these points to understand the exact area to patch.
- Based on your provided reference points, it will automatically fill and repair the area.
8) Undo/Redo
Use the undo icon or Ctrl + Z to undo, and Ctrl + Shift + Z to redo actions.
9) Complete the Fill
DJI Modify will automatically repair the holes after you’ve selected and clicked ‘Fill Holes’.
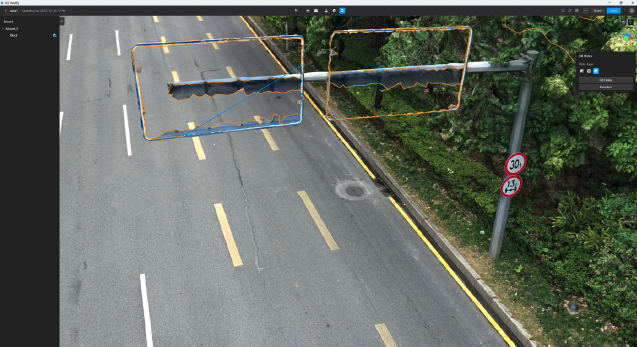
Whether you’re a seasoned drone enthusiast or just starting out in aerial surveying and 3D modelling, DJI Modify is a powerful tool in your arsenal, offering enhanced flexibility and creativity in your projects.
Remember, the journey with DJI Modify doesn’t end here. With its seamless integration with DJI’s range of products, this software opens up a world of possibilities. We encourage you to experiment, explore, and push the boundaries of what you can achieve with this innovative technology.
Download our FREE GVC Training Guide
Learn everything you need to know about becoming a drone pilot with our GVC training guide.
- Get a full course roadmap to understand every step of the journey
- Contains clear answers to all of the frequently asked questions
- Get a transparent and comprehensive breakdown of course costs


